Showing posts with label crafts. Show all posts

Monday, April 2, 2018

Our Painted Piano


We refinished our piano. This piano was given to us a few years ago. The wood was a little old and had some stains. Plus I really wanted to brighten up our small apartment. We primed the piano with the a Zinnser stain blocker, then painted it with ivory colored paint. It was a lot of work, but we love it.


Saturday, December 9, 2017

Wood Burning Tool ~ Christ Centered Ornaments

I thought I would share this fun little craft I did last month in prep for Christmas. My Christmas tree is a little sparse and at the moment, it needs some ornaments that will not break with toddler hands touching them. After some research, a friend and I decided to make ornaments that have pictures of Jesus Christ's life and a scripture to go with them. I plan to use this as an advent in December.


I learned how to use a new cool snazzy tool. The wood burning tool. I have a close picture of it later. It had a bit of a learning curve, and I was discouraged at first. But you get the hang of it and it actually was fun to use!

Materials:

Wood slices
Pictures of Christ - trimmed to fit the specific wood circles
Wood Burning tool
Tiny little hook screws
Twine
Modge Podge
Sponge Brush
Tracing paper
Printed scriptures on paper to trace
 

DIRECTIONS: 


1- Glue all the pictures of Jesus on your wood slices. I don't modge podge the front yet. I want to wood burn the back with the scripture first. I used a free scripture list and went and gathered my own photos on LDS.ORG where they have free high quality downloads


2- Use tracing paper to make a pattern for you to follow when wood burning on the back of the wood slice.


3-  Use the wood burning tool to carefully follow the pattern you traced. SLOW and STEADY is the trick. Try to apply even pressure throughout so that the lines are not different levels of thickness. Be sure to practice on other wood first.


4- Modge podge the top of the pictures to add texture and secure the pictures in place. Let dry.


5- Screw in tiny hook and tie twine through to hang on the tree. I found that starting a hole with a little screwdriver helped secure the hook, plus helped prevent cracking. If you want you can add a tiny little bow on the top of the wood slice. I saw a bunch of cute little examples of Pinterest.


Happy Christmas Season!

Tuesday, November 14, 2017

Fall Dresses

I have had a recent obsession with dressing my little girls this fall. I love the current trends and am definitely capitalizing on the fact that hand sewn clothes are in. I LOVE to sew. I love these fall dresses that I made for them and they cooperated pretty well for the camera. I had to share

 I used an old dress I made for Madi the year before, took down the hem and added the long sleeves with the flutter. First long sleeves I have done. It was fun and not to hard! She hasn't complained so I think it must be pretty comfortable.
For Jordyn's dress I had some extra fabric that I sewed the dress with. I added the round ruffle collar that I have seen lately. After it was done, I decided it needed something black. I really didn't want a sash or a flower, because I wanted it to go with the theme of vintage from Madison's dress. Embroidery was the answer. I got some help from a friend and completed my first embroidery project. It has a lot of mistakes, but I am still pretty proud. Enjoy the pictures of my goofy girls.


Anybody else find that loving their kids is a lot easier when they are dressed cute!


Monday, June 5, 2017

Stenciled dance bag


Madison is starting dance! I couldn't be more excited and we will see how excited she is to go after her first class today. We will see.

Anyways, I made her a stenciled little ballet bag. My mom had a drawstring bag and then I created a vinyl stencil with the cricut and painted it on. It was easier then I thought! I shared some pictures below, because I learned a few things about using vinyl as stencils that I thought were really useful. The techniques can be applied to any stencil project.

p.s. I can't take credit for the design. I basically found a picture I liked on Pinterest and then created a look a like in my cricut program.

So first I created my design and then cut it out with my cricut on vinyl. (The sticky back plastic paper) I then pulled all of the design away, only leaving the outline and of course made sure to leave the middle parts of the pictures and letters.

I was a little nervous about getting those small, middle parts of the letters and pictures onto the bag and originally planned to do it by hand, but decided to use contact paper! I put the sticky side of the contact paper on the stencil and rubbed really hard to attach everything, even the little middle pieces to the sticky paper. I then carefully pulled the stencil away and stuck it to my flat draw string bag. I also really rubbed the stencil so it would adhere to the bag and then carefully pulled away the contact paper! It worked wonderfully. Just took a little bit of time.


I then used acrylic paint to sponge in the different graphics and words. I mixed in a little bit of fabric additive with the paint that I just purchased at a normal craft store. I used make-up sponges to dab the stencil. Easy Peasy!


I then let the paint dry then carefully peeled off the vinyl stencil.


And if course I am going to show off my tiny ballerina.


Tuesday, May 30, 2017

Flutter Sleeve Shirt


Isn't the cutest. I love it.

Madison is in desperate need of a few shirts for Summer outings. I found this pattern online for the shirt that easily could be made into a dress. I was very tempted to make the dress, but my girls have more then enough dresses for the summer.

I bought this fabric ages ago. (about 6 years ago) and had extra that I kept from another project. I had all the materials on hand for this shirt. The buttons, white fabric for the lining, interfacing, and then of course, the extra fabric. It may have been cuter to maybe use some darker buttons, but hey, I didn't have to spend money and more importantly I didn't have to make a run to Joanns! Seriously, probably the worst errand to take little children on.


I haven't sewn flutter sleeves before, but I LOVE them and they are actually way easier to sew then normal sleeves! Win win! The tutorial was fairly easy to follow and the shirt looks very finished! I used a French seam on the back of the shirt that contains the only raw edge. All other raw edges are lined. I have never done buttons before, believe it or not, and I was a tad nervous. I actually really like the buttons, and it is super easy. I just don't know any of the measuring tricks to make sure it is all evenly spaced. There has to be a few tips and tricks right? I measured pretty meticulously a couple of times and one button is still slightly off. :)

What a cute shirt for a cute girl. I did bribe her with a small treat for these pictures..... this girl.

Tuesday, April 11, 2017

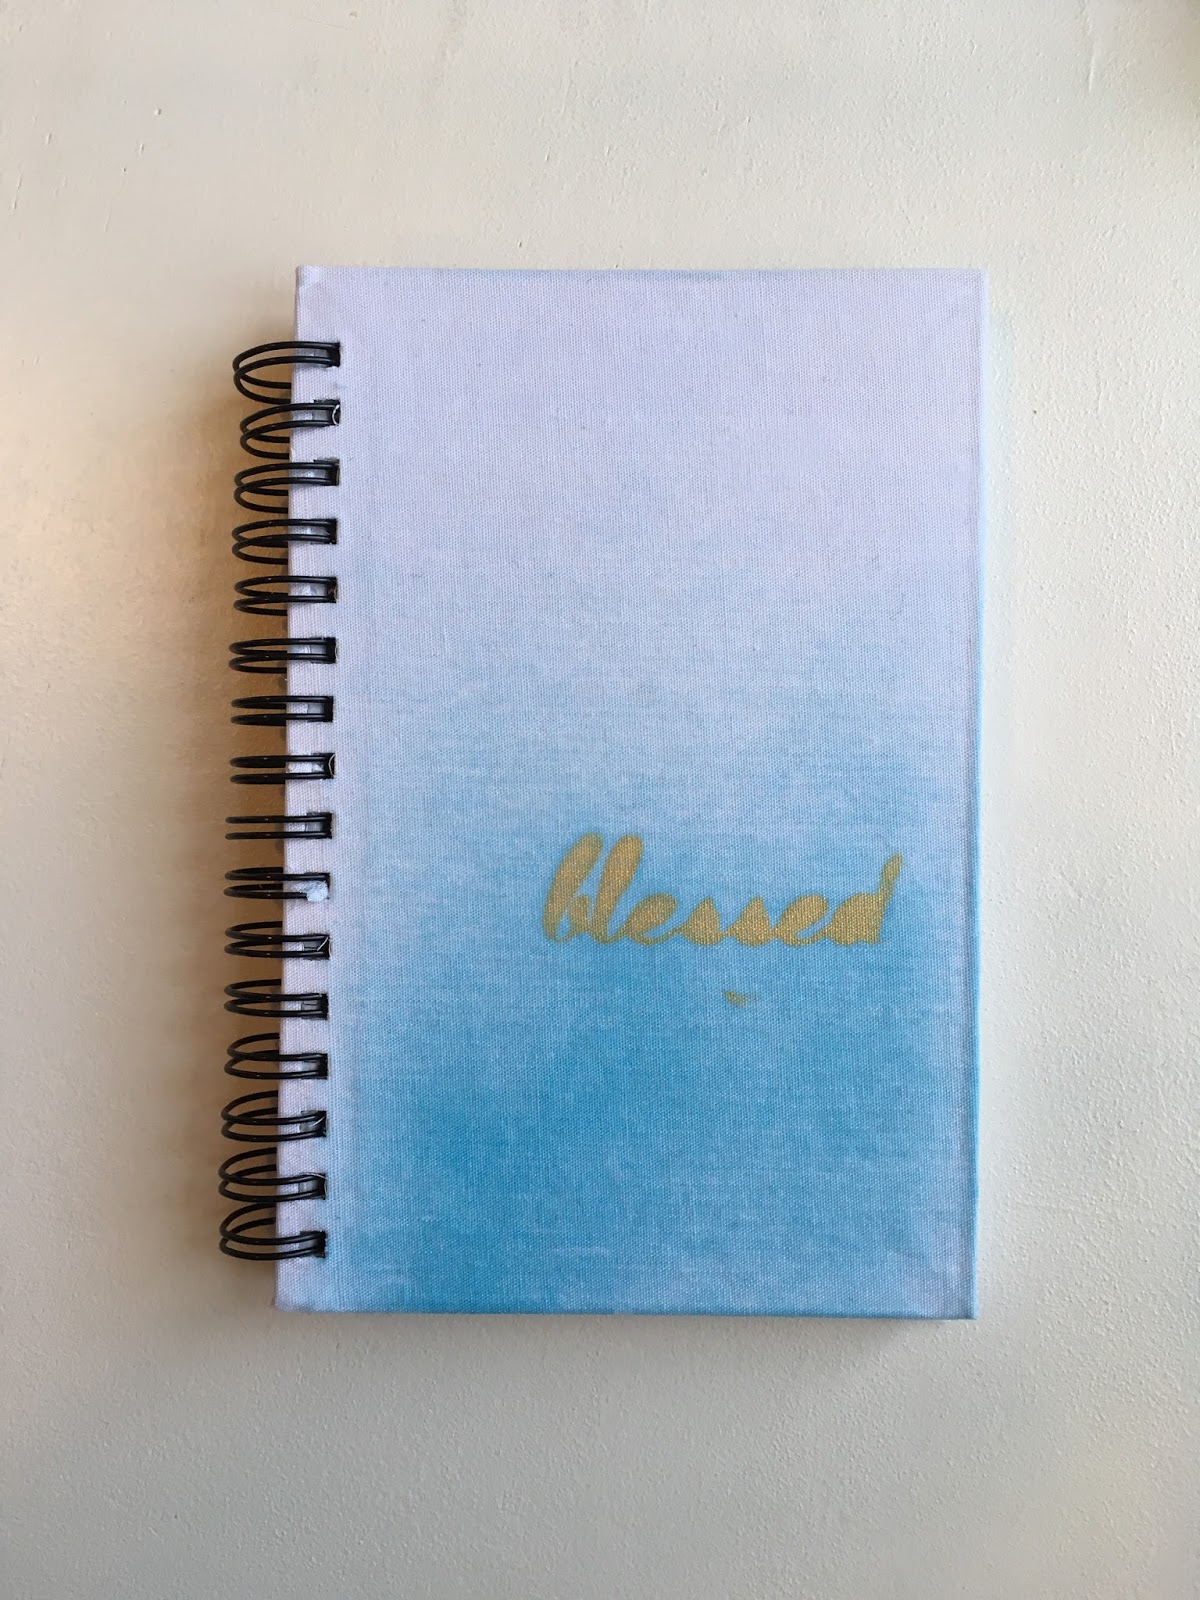
DIY Ombre Gratitude Journals


I was asked by the Stake Relief Society to put together a little mini journal for people at a stake activity. (About 100 ladies). They wanted it to be a little craft/artsy, but not take too long. I LOVE doing things like this, researching, planning, the whole shebang. It just makes me self-conscious. Luckily, I am not going to be there for the actual activity. I just put it all together and passed it on. :). As it turns out with all projects, every step along the way, there is always a bump in the road. SERIOUSLY! Every step I needed to modify to actually make it work perfectly or at all. I don't think I have just sat and watched or read something for a naptime for 2.5 weeks. It has been fun, just tiring. My idea center needs a serious break. At least a short one.

To begin, I bought a ton of mini notebooks from Oriental Trading company. My budget for the whole thing was around $200. Each notebook was a little over a dollar. Already that takes a little over half my budget. However, the notebooks are pretty cute and seem durable. They have white canvas covers, that leave it wide open to do what you like with them.

After doing some research and getting some opinions I decided to go a route a little different then my comfortable one. I came to the conclusion that I wanted to do a water color type ombre look, but decided that watercolor is just too easy to mess up and end up not liking. Doing MORE research I came across distress ink, and loved it. Card makers use it, and it seemed user friendly. I wanted to give everybody their best chance at liking their DIY journals at the activity. The distress ink has a chalky/water color lookish that is easy to create an ombre look.


I  constructed my own cost friendly ink applicator brushes with the help of Jordan's engineering. Because of a potential of a lot of people at the booth at one time I wanted 16 different ink pads with their own sponges. Each applicator brush is $2 at 40% off. Which means, I would be going to Hobby Lobby every day for a couple of weeks to buy these mini brushes that already are a  tad pricey for an amateur activity. However, the circular sponge at the bottom is essential. Luckily, they sell the pads separately as a refill that stick to the brushes with Velcro. Jordan said we could buy a thick wooden dowel for $4 and cut it into 16 pieces and stick Velcro on the bottom. WORKS LIKE A DREAM! BRILLIANT!


As an optional embellishment I cut out a few stencils on my Cricut for people to put on the top. Hearts, flowers, and also a few words and quotes. As I was practicing this technique I ran into a lot of issues. Canvas will bleed almost every material. At first I used a Sharpie. FAIL! Then I came up to actually just use black stamp ink. That also bleeds. I almost was in tears at this point. haha. However, acrylic paint doesn't bleed, it is cheap, and dries quickly! I bought cosmetic sponges and then dabbed my stencils with a little paint and WALLAH!


I literally decided to add gold paint to the options after I wrote the majority of the post. I did this journal just a couple of hours before I hit 'publish'. Shows how my brain works with projects.

I created a little tutorial for them to have on repeat at the activity just to foster a little confidence for people to get started. I wanted them to see how easy it actually is! I also created a little gratitude prompt printable to glue inside the cover that have some guiding questions if they ever get in a journaling rut.

My mother may be the only one that can see the movie. Not sure why it only plays on actual computers and ipads and not iphones. If someone has any expertise, please let me know.


They aren't perfect, but they have character.  I cannot wait to drop them off at the girl's house who is going to take care of them at the activity. This project has been dominating my brainpower and naptimes. Good times!

Wednesday, December 14, 2016

Kitchen table redo

Over Thanksgiving break we re-did our kitchen table and chairs. This table was given to us by my in-laws. It wasn't in the 'worst' condition, but not the best either. We sanded it down, painted it with some heavy duty primer and paint and I love the finished product. Someday, my walls won't be white and it will be perfect for a little breakfast nook!

We followed this tutorial EXACTLY! The primer and paint brand needed to be pretty durable to stand up to our family and toddlers. So far it is doing awesome and holding up well.

The chairs were in the worst shape, but I used some gray chalk paint and they turned out pretty well!

Here are some before and after pictures.


I had a little shelf that really didn't have a particular place. I painted it up to match the chairs and table runner. I have new plan that will be finished in the summer, but this is perfect while I wait.


Don't you just love the phone jack!! haha...


I love DIY projects, especially ones that make a big difference to make me love my little apartment. We learned a ton doing this project and I feel even more confident when I have to paint other furniture around my house. It did cause a little chaos in our little routine. The paint has to cure for a long time so we ate on our living room floor for a little over a week and Madison wasn't allowed in the kitchen, however, I think it was worth it. I love it!